Entirely stuck on how to draft a blog post in WordPress?
Today’s guide is a simple, easy, effective, with pictures (you’re welcome!) tutorial on just that.
FYI: blogging for business is making a comeback (spoiler alert: it never died).
Everyone hates being sold to, which is why 40% of internet users proactively block ads.
But with over 1 billion blog posts published this year alone, the internet is full of content. How will yours stand out?
With a strong content strategy in place, your blog posts will be lead-generating machines.
And WordPress is arguably one of the best-known blogging platforms out there. It’s the strongest, most stable one for SEO.
Let’s get into the quick, simple guide: how to draft a blog post in WordPress, step-by-step.
Step-by-Step: How to Draft a Blog Post in WordPress
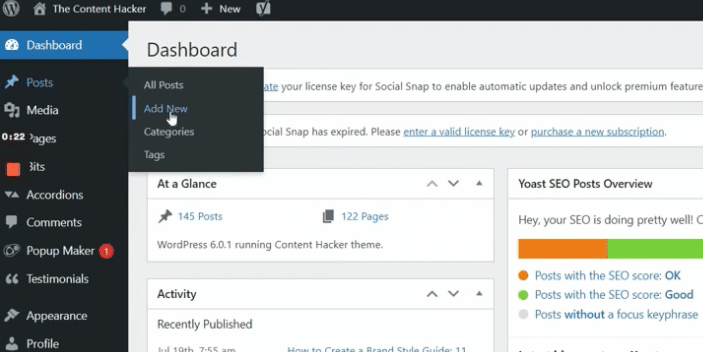
Take a moment to familiarize yourself with the page. There’s a lot going on here, but we’ll break it down for you.
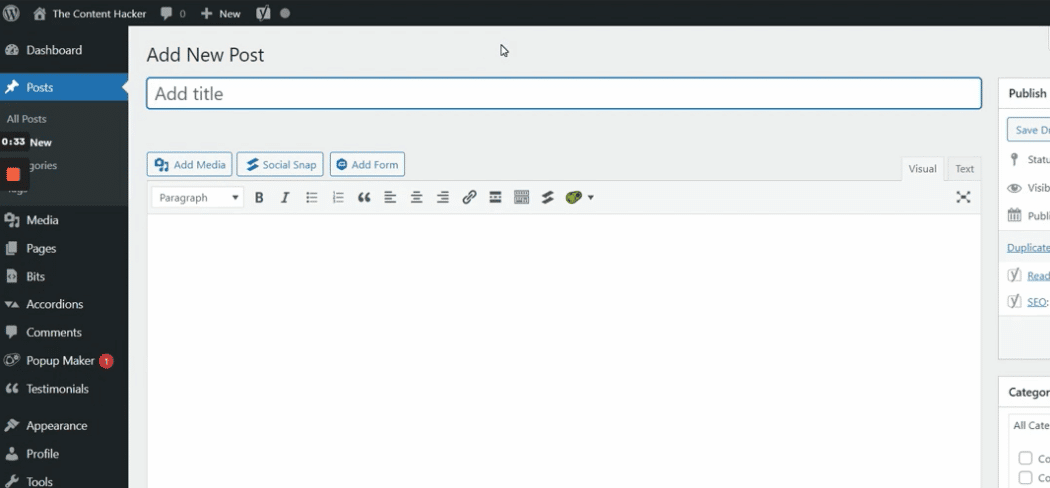
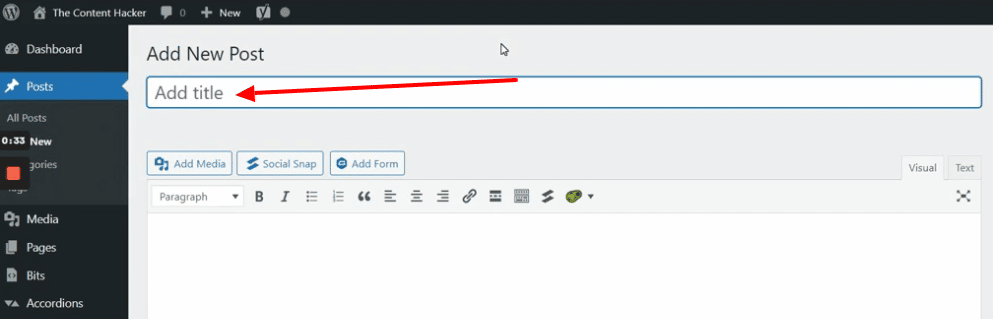
At the top, you’ll find the title of your blog post.
The main content box underneath is where you’ll write your post. You can also just copy and paste the content if it’s saved in a separate file.
Don’t know what to write? Try a content writing template.
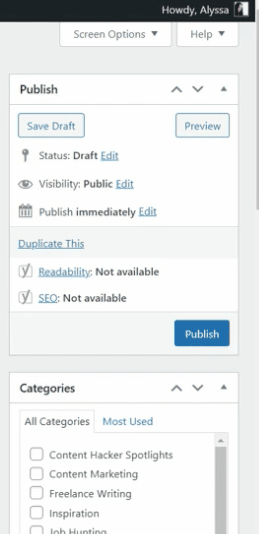
Your publishing options and settings are on the right. You’ll also find categories and tags along the side. Then there are the settings for your featured image.
Still breathing?
I don’t expect you to have it all memorized. There’s no test at the end of this. Take as much as time as you need to get used to the interface.
And this is just a bird’s eye overview. We’ll come back to the different sections in a moment.
Under the main content block, you will find your SEO settings.
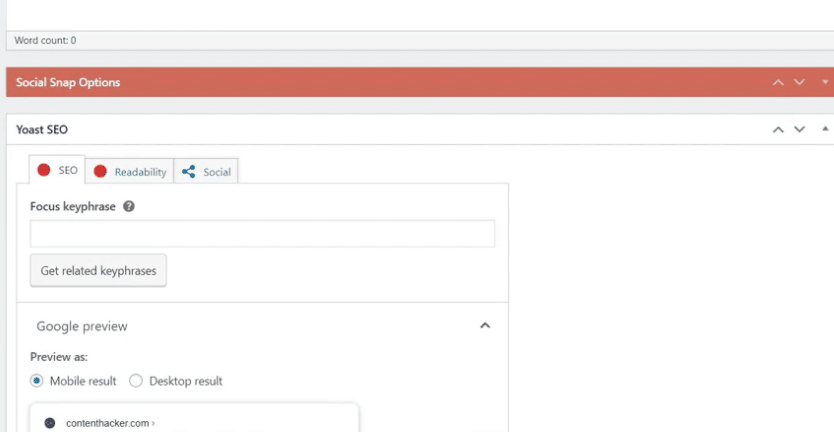
Pay attention, because this is really important.
Your SEO settings include the focus keyword or phrase, your SEO title, and your meta description. Let’s talk about this in more detail, because this is the non-intuitive part of publishing a blog post.
If you leave this blank, your content marketing strategy starts off with a limp. You may still finish the race, but it will take you a lot longer to reach the end.
How to Use the SEO Settings in WordPress
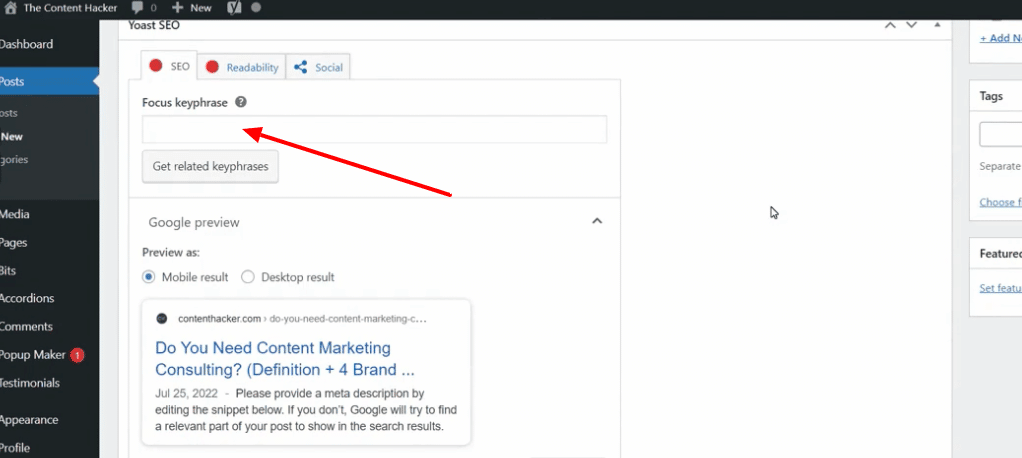
1. Focus Keyphrase
Let’s start with the focus keyphrase (i.e. the main keyword or phrase you’re trying to rank for). In our example, the focus keyphrase is “content marketing consulting”. Yours will probably be different, depending on your keyword goals.
By the way, if you’re not up to speed on best SEO practices or just need some help finding relevant keywords for your blog, check out our list of 15 SEO DIY tools.
2. Google Preview & Meta Title
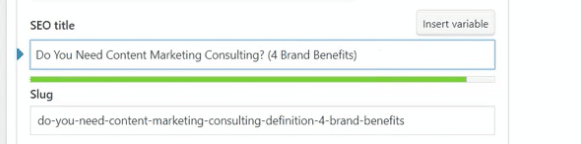
Let’s use the Google preview to see what the snippet for your page looks like on mobile and on desktop. In our example, the title was too long. This means it gets cut short when it appears in the search engine results pages, short SERPs.
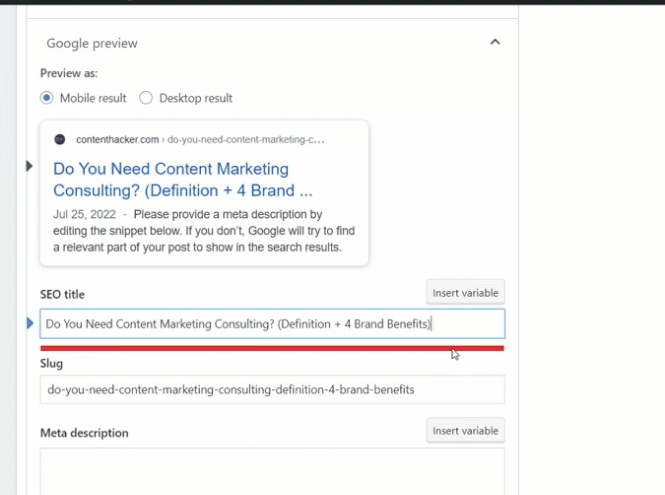
Do you see those three dots after the title? That’s not good.
When someone finds your blog post online, you want them to see the title in its entirety.
If it has too many characters, it won’t fit. In WordPress, you’ll see a red bar if the title can’t be displayed in full length.
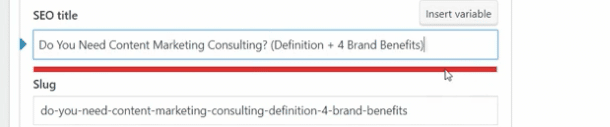
Red is bad. You want that bar to turn green.
It’s an easy enough fix. We just edit the title until it fits. But don’t remove the keyword from the title when you do that. You may need to tinker with it until it has the right length and still sounds good.
Once you have a green bar, your Google preview should look much better. Score one for you against the SERPs.
3. Edit the Slug
Next, you want to check the slug.
Oops. Wrong slug.
The slug we’re talking about refers to the words at the end of the URL for this post page. It’s good practice to use the keyword phrase or shortened title as the slug with dashes in between.
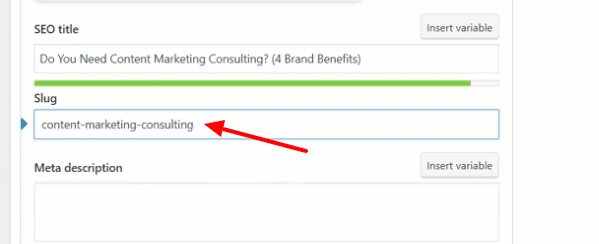
For example, we have contenthacker.com/content-marketing-consulting in our example. That looks good. Don’t keep any auto-generated slugs with random letters or numbers, which can happen if you haven’t added a title to your post.
4. Meta Description
The last piece of the SEO puzzle is the meta description. You don’t need to worry about creating it. Your writer will provide it to you. Just copy and paste it here. The meta description is the snippet you see when you pull up search results in Google.
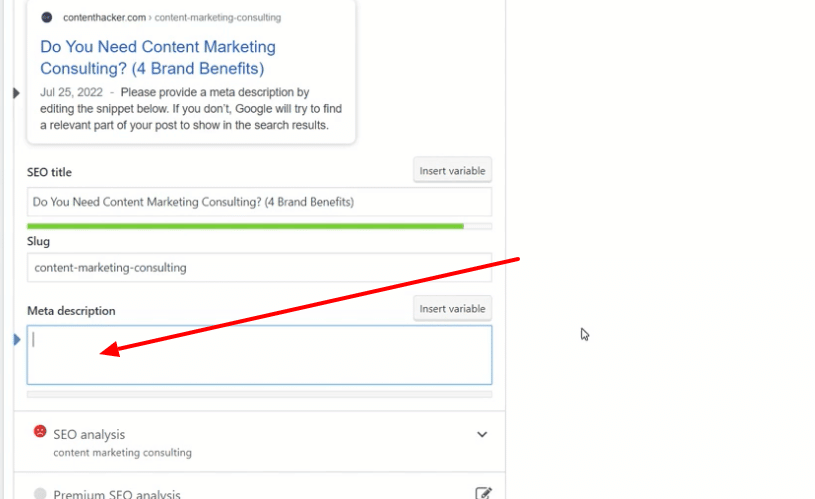
Without it, Google will display the first few lines of your blog post. Instead, we want a specific description to encourage readers to click and read the entire post.
Formatting/Drafting Your Blog Post in WordPress
Now it’s time to actually draft your blog post in WordPress.
Most likely, you’ll copy and paste your blog content from a saved document to the content box inside of WordPress. Just select everything and copy and paste the document in its entirety. The images won’t copy over, but it saves time to do it all at once.
There’s a good chance some of the formatting won’t transfer properly. This means you’ll have to double-check everything.
Here is your list of formatting tasks:
- Edit your links to open in a new tab
- Check your headings for proper formatting
- Verify the hierarchy for your headings
- Upload and insert your images
- Add the ALT text for your images
- Edit custom snippets of code
- Pick a category
- Set the featured image
These may take you some time if you’re unfamiliar with the process. But eventually, you’ll zip through them.
We’ll tackle them together right now.
Ready? Set… Go!
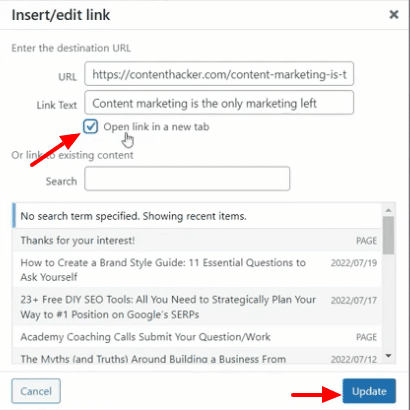
1. Edit Your Links
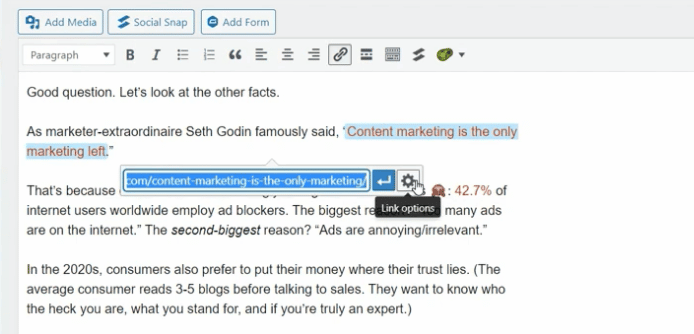
You want to make sure all your links will open in a new tab. Click on the link. Then click the edit button. Next, select the link options and check the box that says “Open link in a new tab.” Hit the update button.
The bad news is you’ll have to do this for every single link in your blog post.
Maybe put on some music and rock on while you perform this tedious task.
2. Format Your Headings
You must format every heading properly inside of your blog post. It can be an H2, H3, or H4. When you copy and paste the content from your document, a heading may turn into regular text, or an H3 heading might show up as an H2 heading.
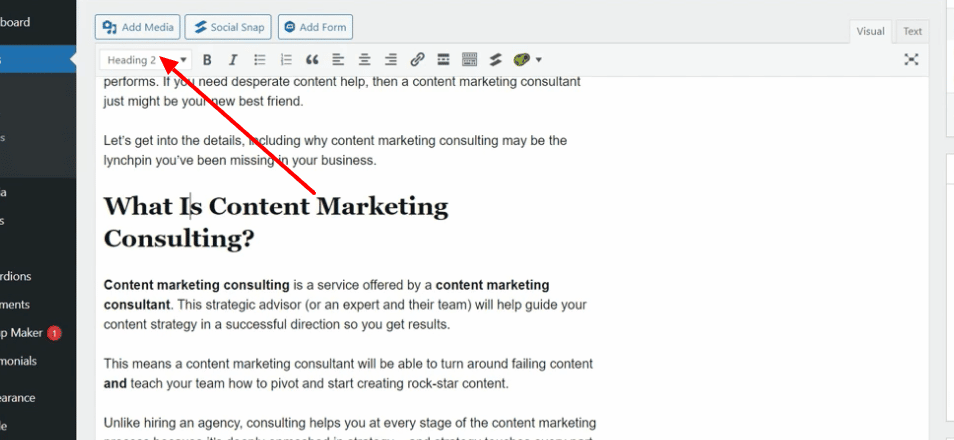
Don’t bold the text or use a bigger font size for your headings. Best SEO practices require the use of header tags (H1, H2, etc.) instead. H1 is always used for the title of your page, but you can use the other headings throughout the blog post.
You also need to pay attention to the hierarchy of headings.
3. Check The Hierarchy for Headings
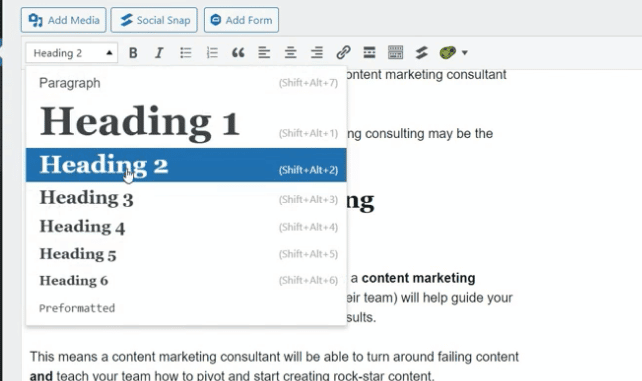
The hierarchy for headings is important because that’s how we organize blog posts. An H2 heading can have sub-headings underneath it. Those must be H3. Any subheadings under H3 must be designated H4.
This system streamlines your blog post formatting for the reader and the search engine bots.
When you copy and paste the text into WordPress, you need to correct any headings that aren’t in the right hierarchy order. Just highlight the heading and select the correct heading type.
We’re almost there. Let’s play with some images next.
4. Upload & Insert Images
Blog posts without pictures are like bowls of cereal without milk. Kind of boring and bland.
Spice up your blog by adding some images (and fruit, milk, or yogurt to your cereal).
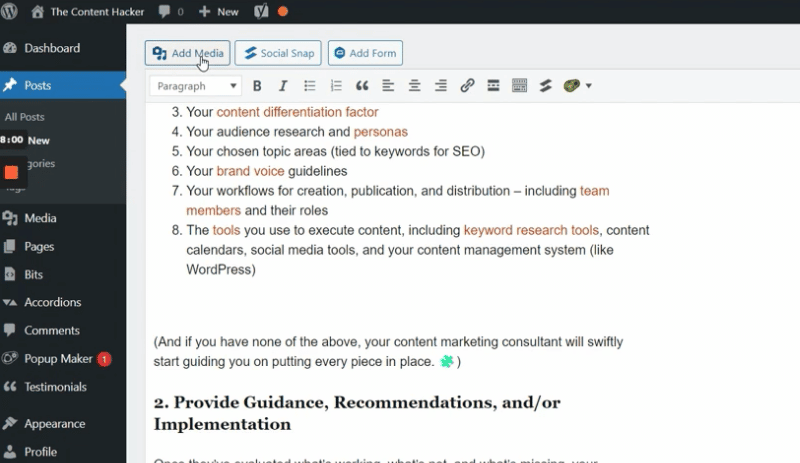
You may have uploaded some pictures in your WordPress media library, such as your branded images. You can set a placeholder for the images and then grab them from the media library when you’re ready.
Go through the entire blog post and make sure you upload all the images.
5. Add the ALT Text for Your Images
Every image should have an ALT text. This is a brief description of what the image is. It’s good practice to include keywords in the ALT text if it makes sense.
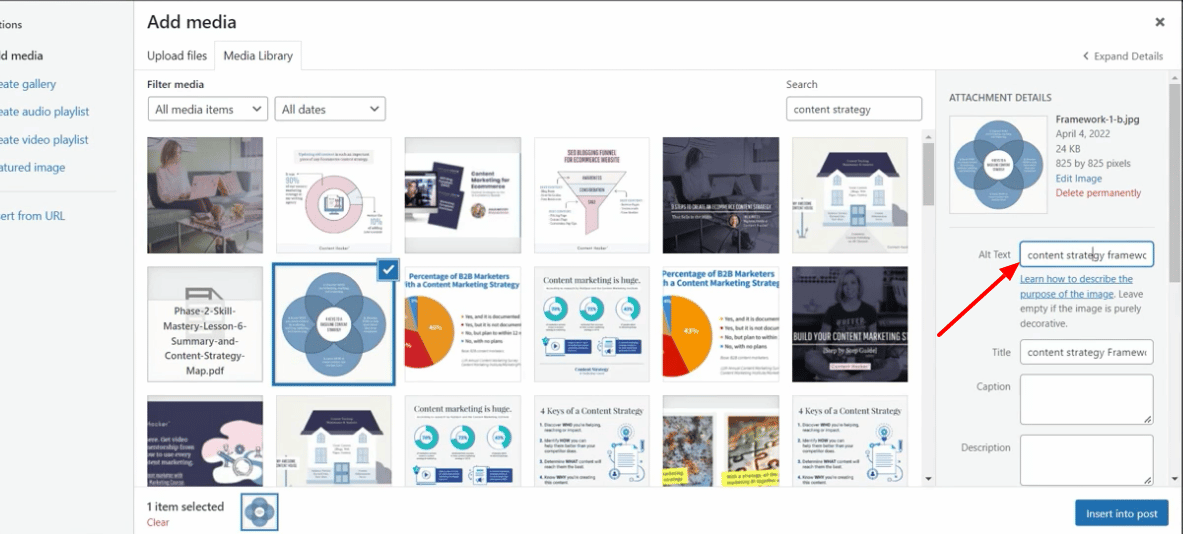
Now you just need to center the image if that’s what you want. Nicely done.
No, you’re not done yet, but we’re close. Hang in there.
6. Add a Call to Action
You’re publishing blog posts for a reason. You want your readers to take action on them, which is why you need to add a call-to-action, short CTA.
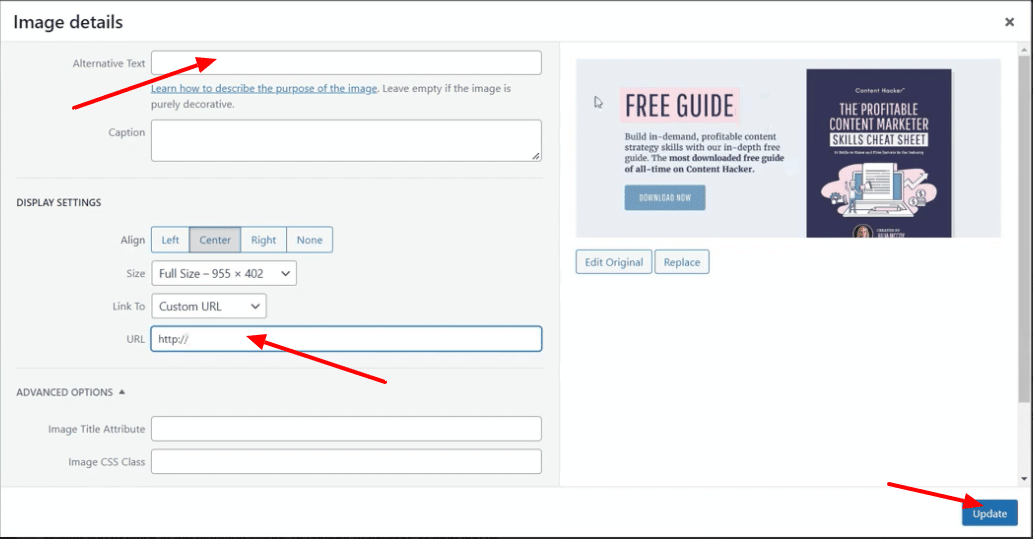
In our case, the CTA is a link for the Profitable Content Marketer’s Skills Cheat Sheet. We add our custom URL for the freebie.
Flashback warning.
Since it’s a link, we edit it to open up in a new tab. Sound familiar? Good.
7. How to Handle Custom Code in WordPress
You may have a custom snippet of code in your text. It could be a link to an embedded video or something else cool you want to include in the blog post.
The bad news is it won’t show up properly as-is. The good news is it only takes a minute to fix it.
The first step is to cut the code (you can also copy it and then delete it later). Then go to the top right of the main content box and hit the text tab.
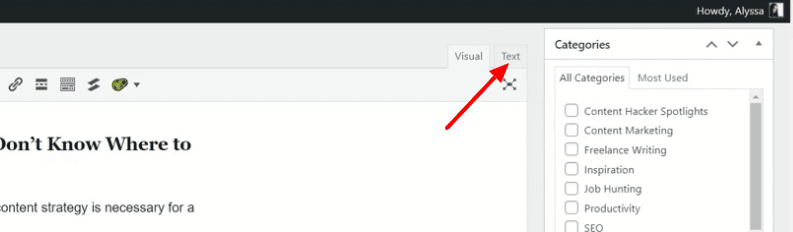
Now you’ll see the code version of your blog. If you’re not familiar with HTML, this will look like gibberish to you. It’s okay. Don’t panic.
The key to success is to do what Aladdin and his monkey should have done in the cave.
Don’t. Touch. Anything.
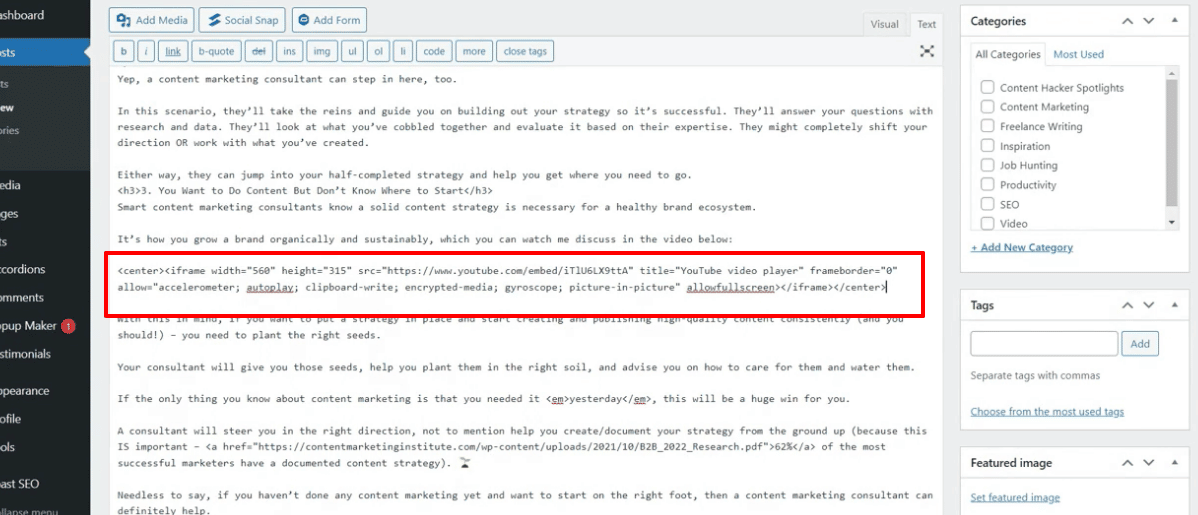
Find the spot where you need to insert the custom code. If you don’t think you can find your way into the document, you can go back to the visual side of the blog and add a placeholder first. Then search for the placeholder.
Now drop the custom code right in there.
Don’t touch anything on the way out, either.
Deleting or altering anything here, such as removing a bracket, can mess up the formatting for the entire blog.
Switch back to the visual view with the button on the top right of the content box. Now you’re back to the familiar.
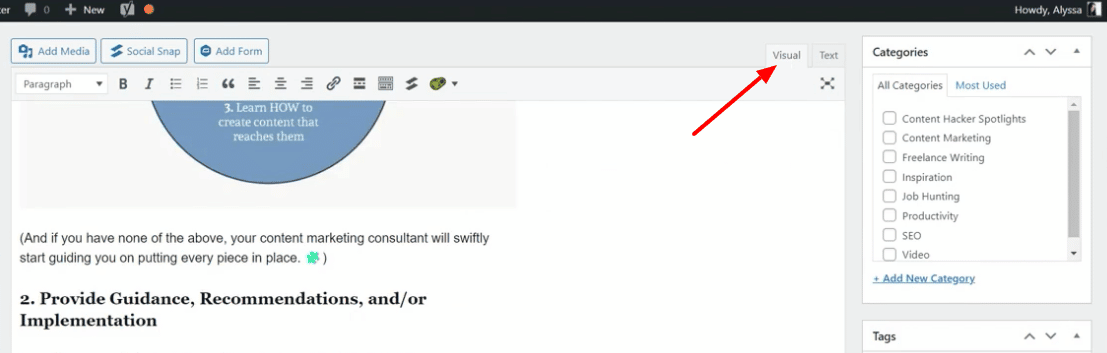
How does it look? Let’s see!
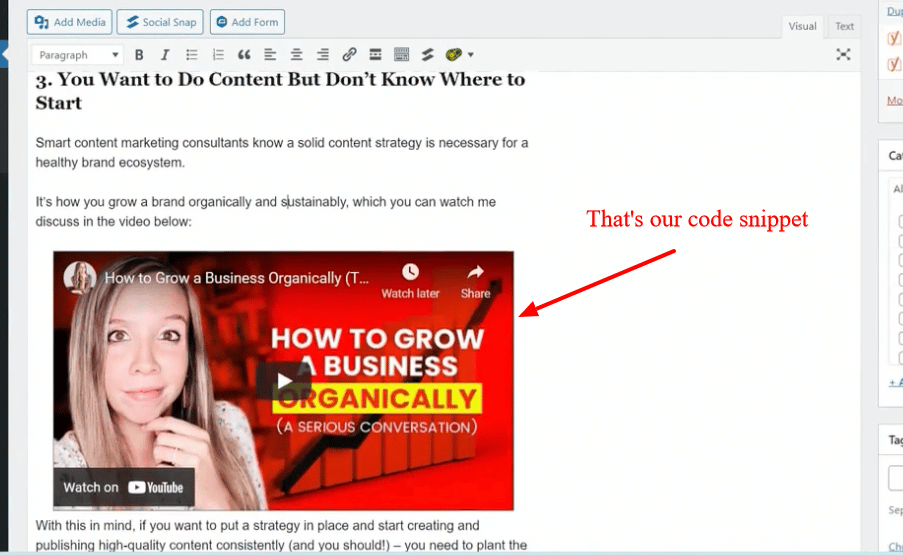
Our code turned into an embedded video. Perfect!
8. Pick a Category
On the right side of the screen, you will see categories. You get to pick one category for your blog post. For our example, the category is content marketing. Choose only the most relevant category. Don’t select multiple options.
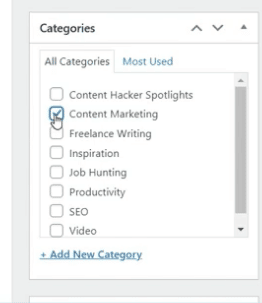
Don’t worry about adding tags.
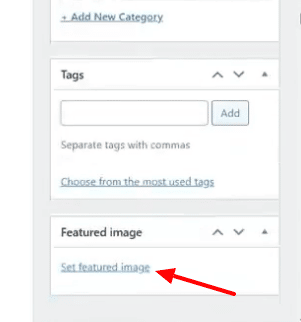
9. Set the Featured Image
Your featured image will be the image that displays on social media, search engines, and anywhere else you share your blog in snippet form.
Don’t forget to add the ALT text.
I knew you wouldn’t. Good job.
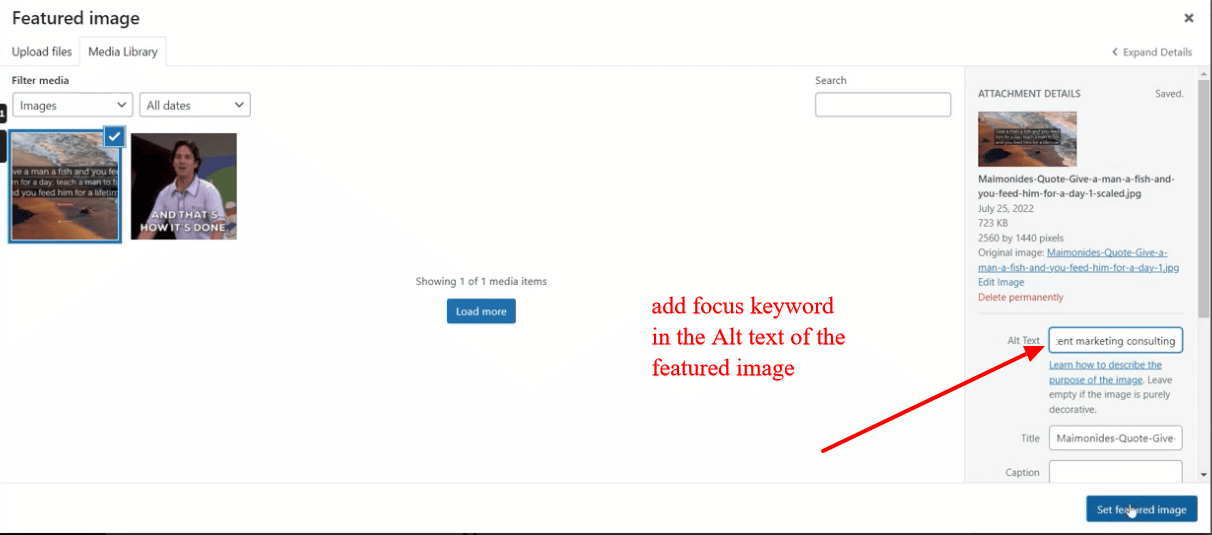
Do you have the focus keyword in the ALT text? Bonus points for you!
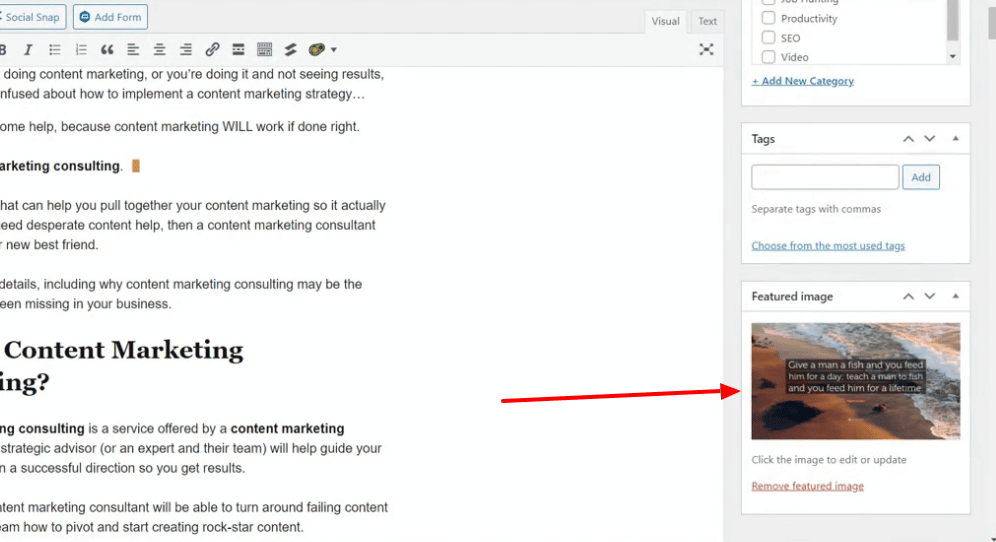
After you’ve saved your changes, you can see the featured image displayed on the bottom right of your post page.
We’re at the home stretch now.
It’s Time to Preview Your Blog Post
It’s time to preview what you’ve written. WordPress allows you to see the post just like it will show up after you publish it.
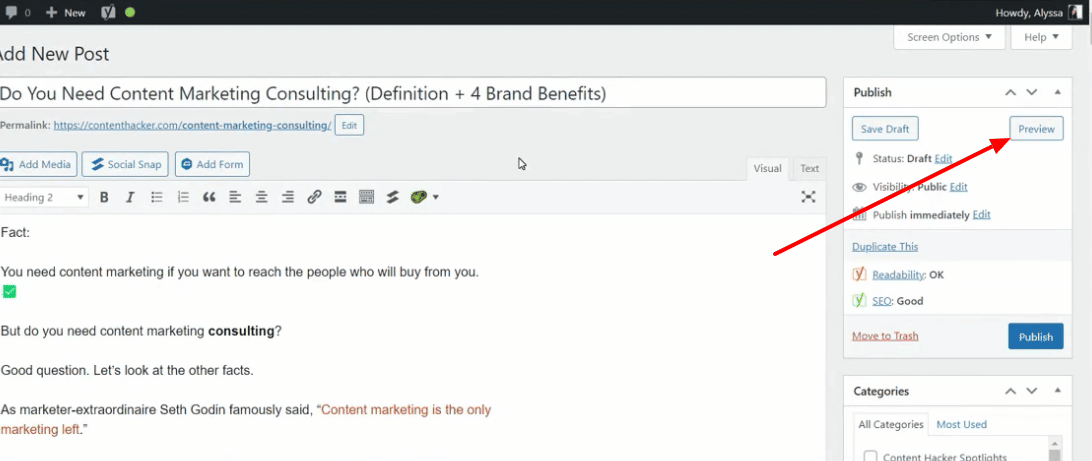
You may be tempted to skip this step, but don’t. Because you’ll always find something you missed.
Check that everything looks good: Spacing. Headings. Images. Embedded videos.
If you need to make any changes, go for it. Otherwise, it’s time to publish!
Publish Your Blog Post
To publish your blog posts, go to the upper right corner of your screen. You can schedule blog posts in advance. (Note: Sometimes WordPress is iffy about posting at the scheduled time.) You can also hit publish immediately or set the date and time for today’s date.
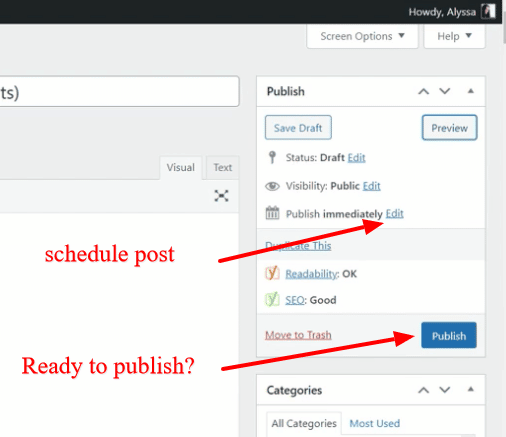
Then hit publish.
And it’s alive! You did it! Your blog post went live. Woo-hoo.

I promise all of it will get easier with every blog post. And eventually, it will be just another thing you do, like brushing your teeth or feeding your cat/dog/child or watering your cactus.
Just kidding. You’re not supposed to water cacti. They die.
Learning How to Draft a Blog in WordPress Is Useless… Without a Great Website
Learning all these steps is essential to ensuring your posts are readable, usable, and rank-able (yes, I just made up that word) in the SERPs.
But what if your website overall is a mess?
Your great content and correctly formatted blog posts won’t land as well as they could.
You’ll actually turn readers off… before they can ever read your great content.
That’s why you need a great website at the foundation of your business.
Stay one step ahead with WorkMind’s blogs, crafted to deliver real results for students and professionals. See what we have in store for you.