Tired of important emails getting lost in the spam folder? You’re not alone! If you’re missing messages from clients, newsletters you love, or updates from your favorite sites, it might be time to whitelist those email addresses in Gmail.
Google blocks 10 million emails per minute and tries to guarantee that less than 0.1% of spam ends up in your emails.
But sometimes, even Google makes mistakes and marks non-malicious messages as spam.
Luckily, there is a quick fix to ensure that your must-see emails land right in your inbox where they belong.
In this post, I’ll walk you through how to whitelist emails in Gmail step-by-step, so you’ll never miss an important message again!
How to Whitelist in Gmail
1. Open Gmail and Go to Settings
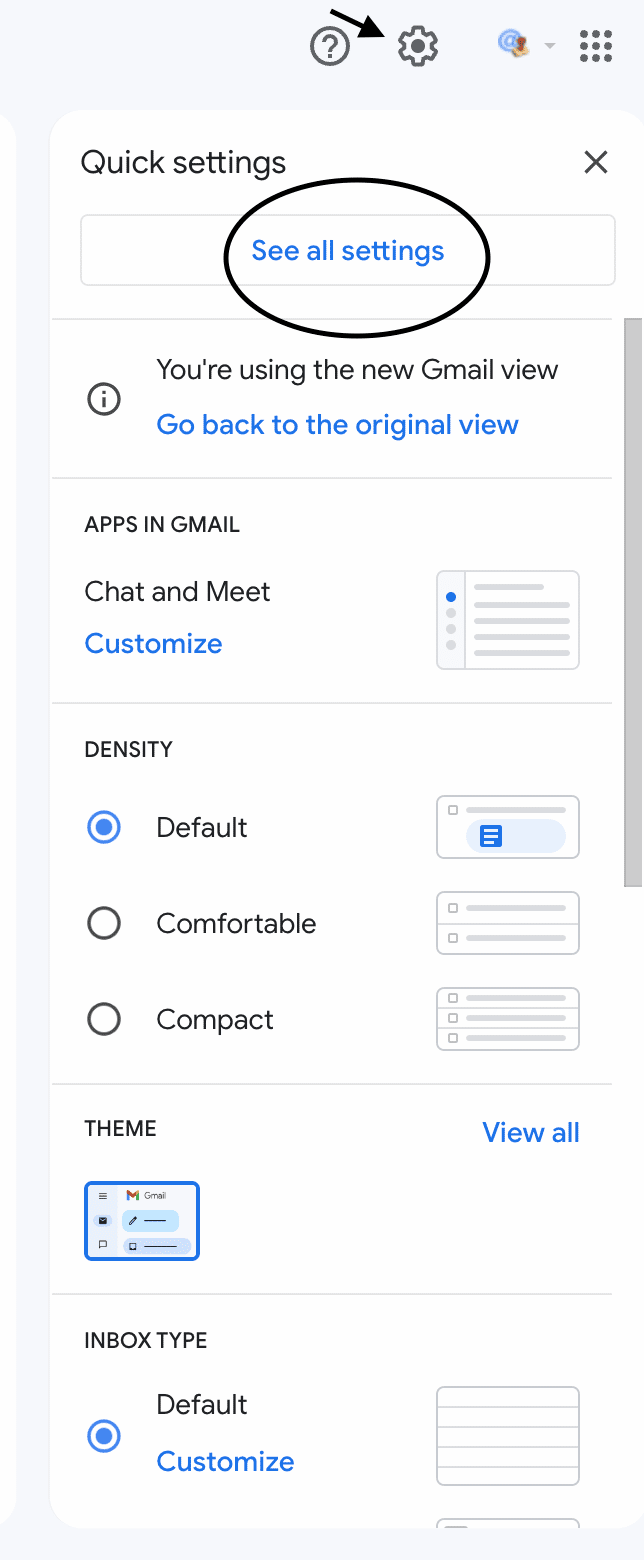
Log in to your Gmail account on a desktop and click on the gear icon in the top right corner. Then select See all settings.
2. Navigate to the Filters and Blocked Addresses Tab
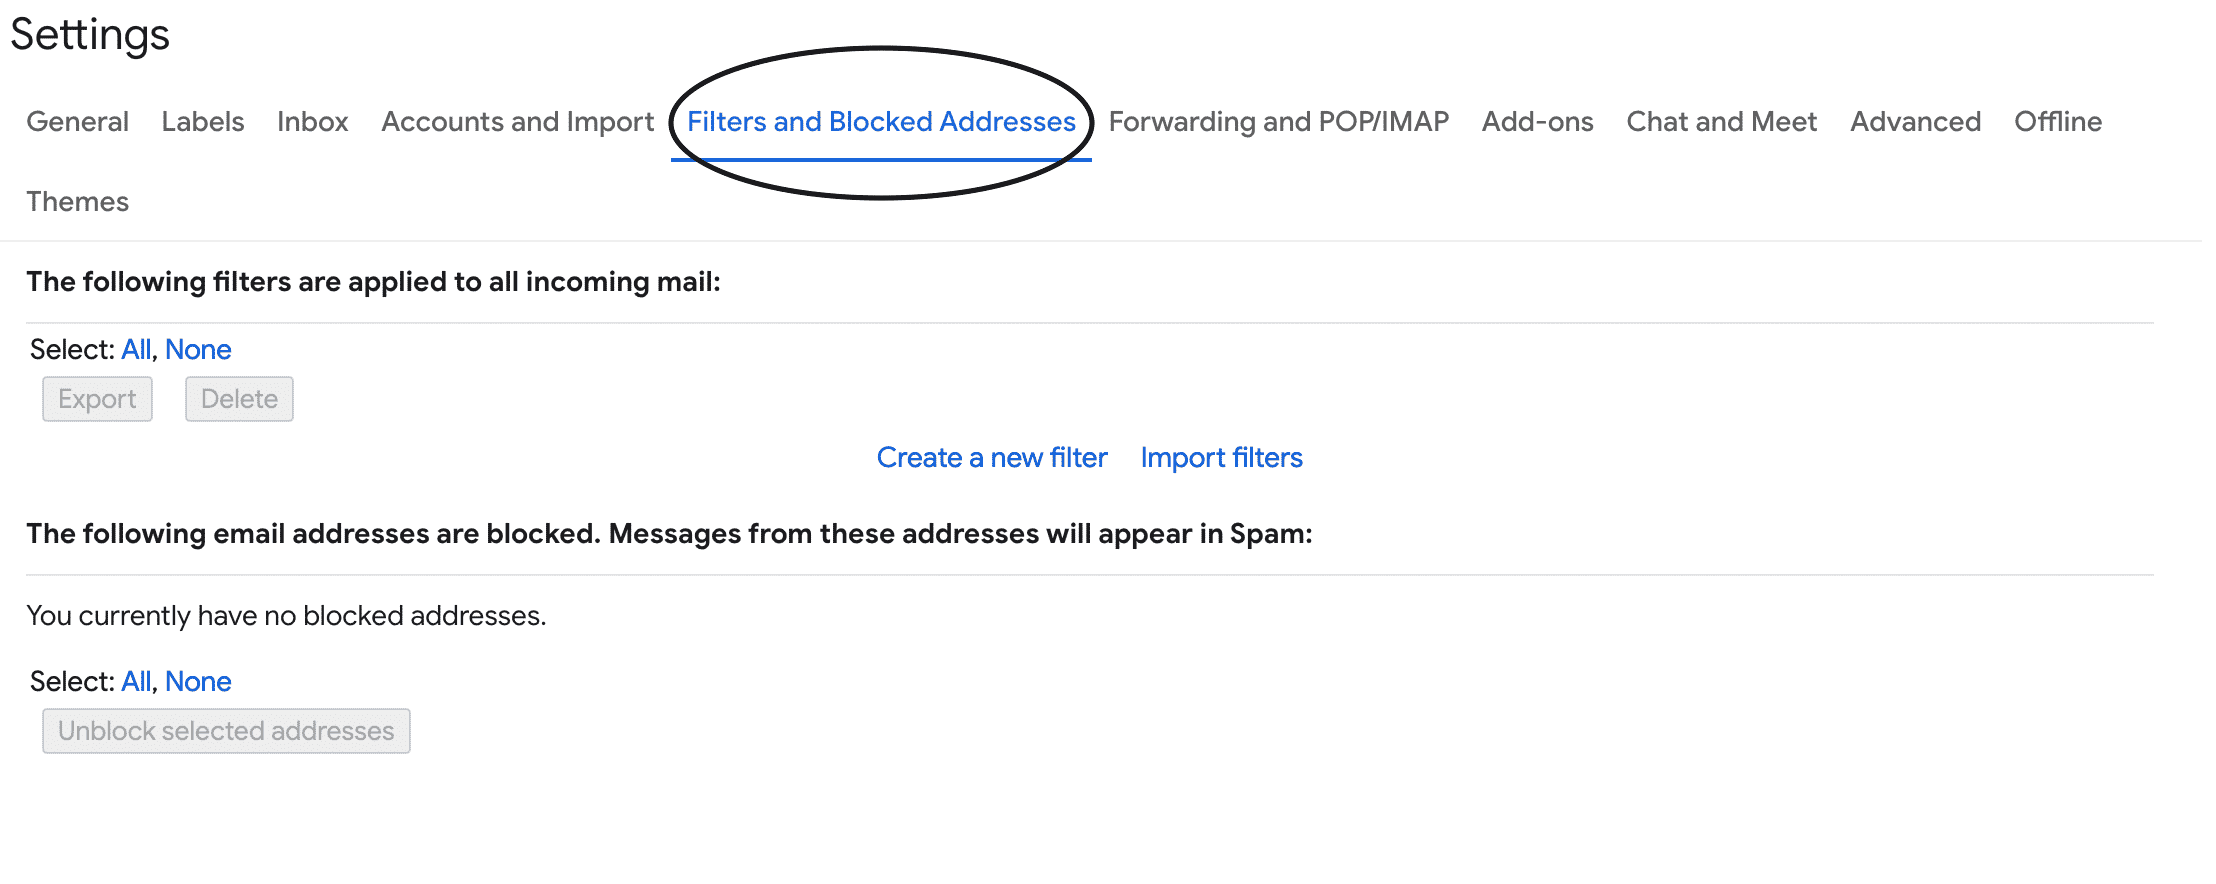
Once you’re in Settings, click on the Filters and Blocked Addresses tab. This section allows you to create custom filters for incoming emails.
3. Create a New Filter
You’re halfway there!
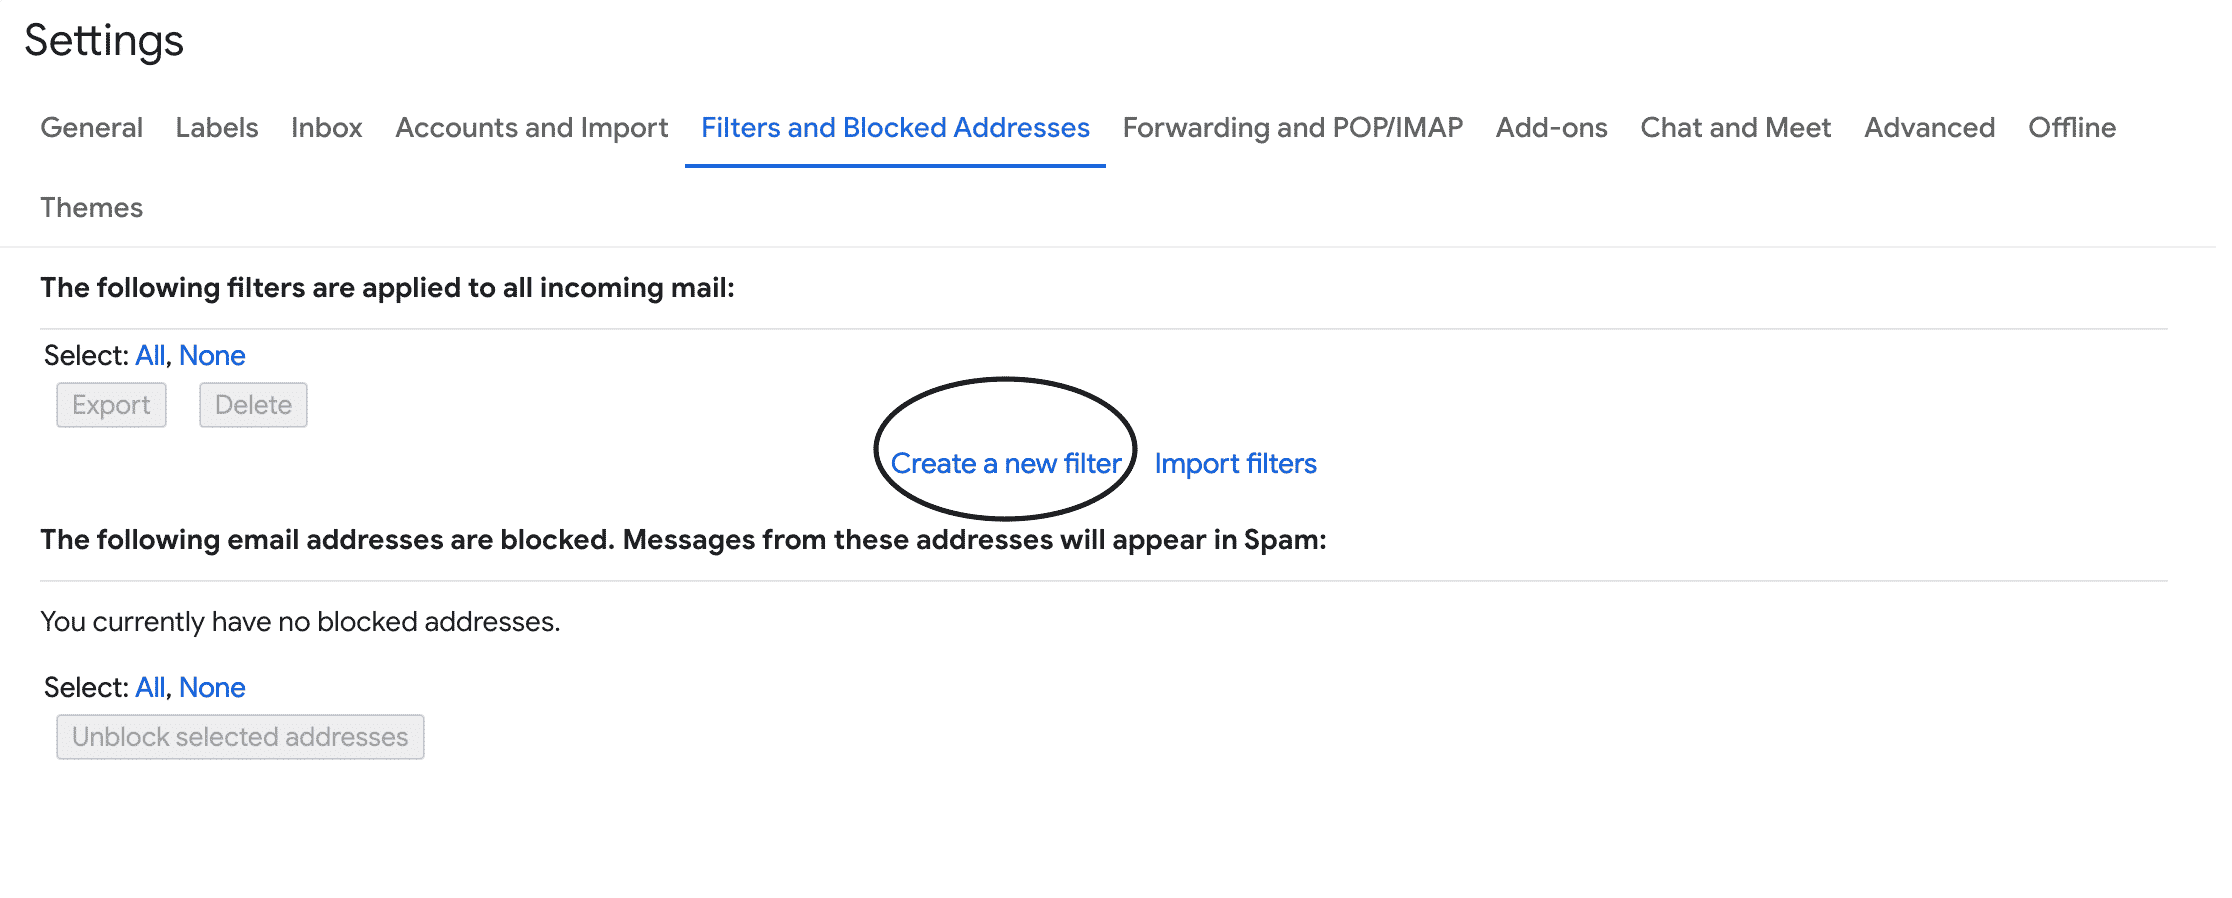
Scroll down and click on Create a new filter. This option is located at the bottom of your filters list.
4. Enter the Email Address You Want to Whitelist
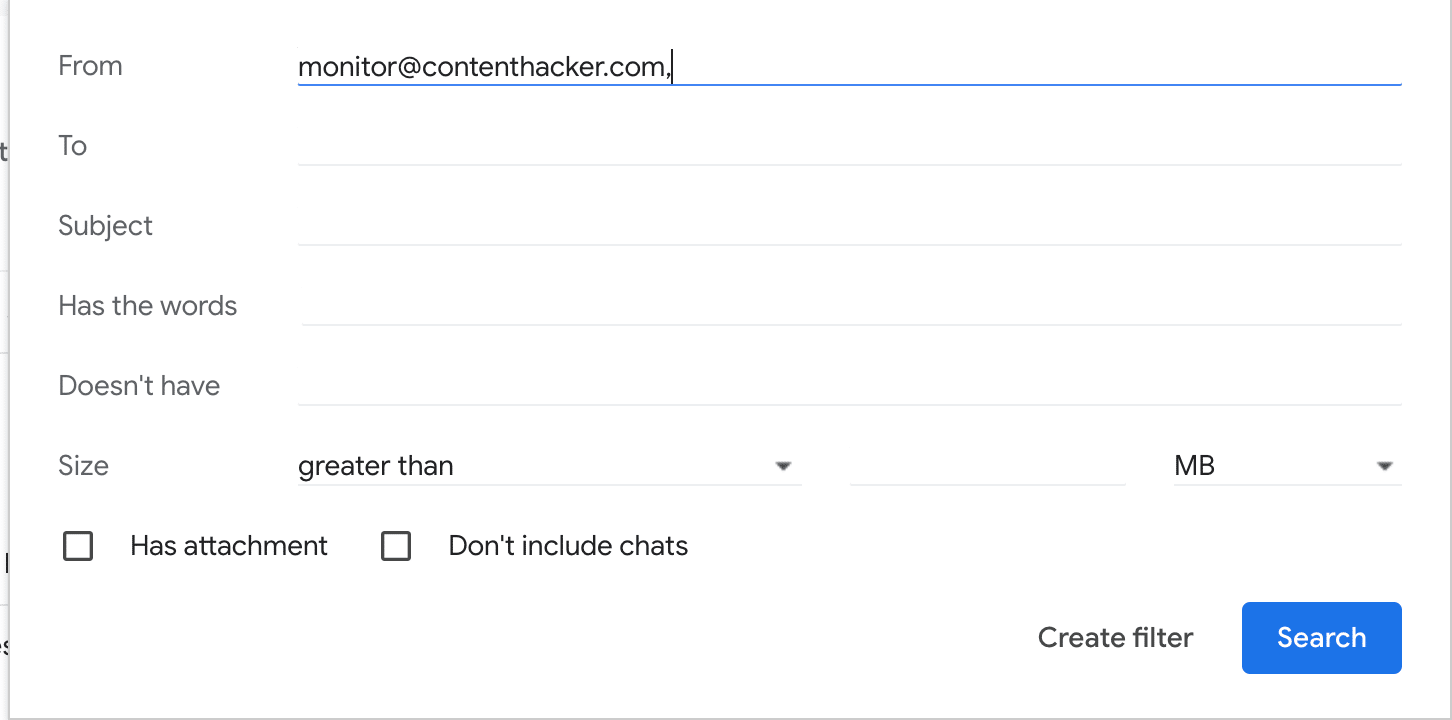
In the From field, type the email address you want to whitelist.
If you want to whitelist a whole domain (e.g., all emails from @company.com), enter it like this: @company.com.
5. Set Up the Filter to Never Send to Spam
Click Create filter at the bottom of the filter options.
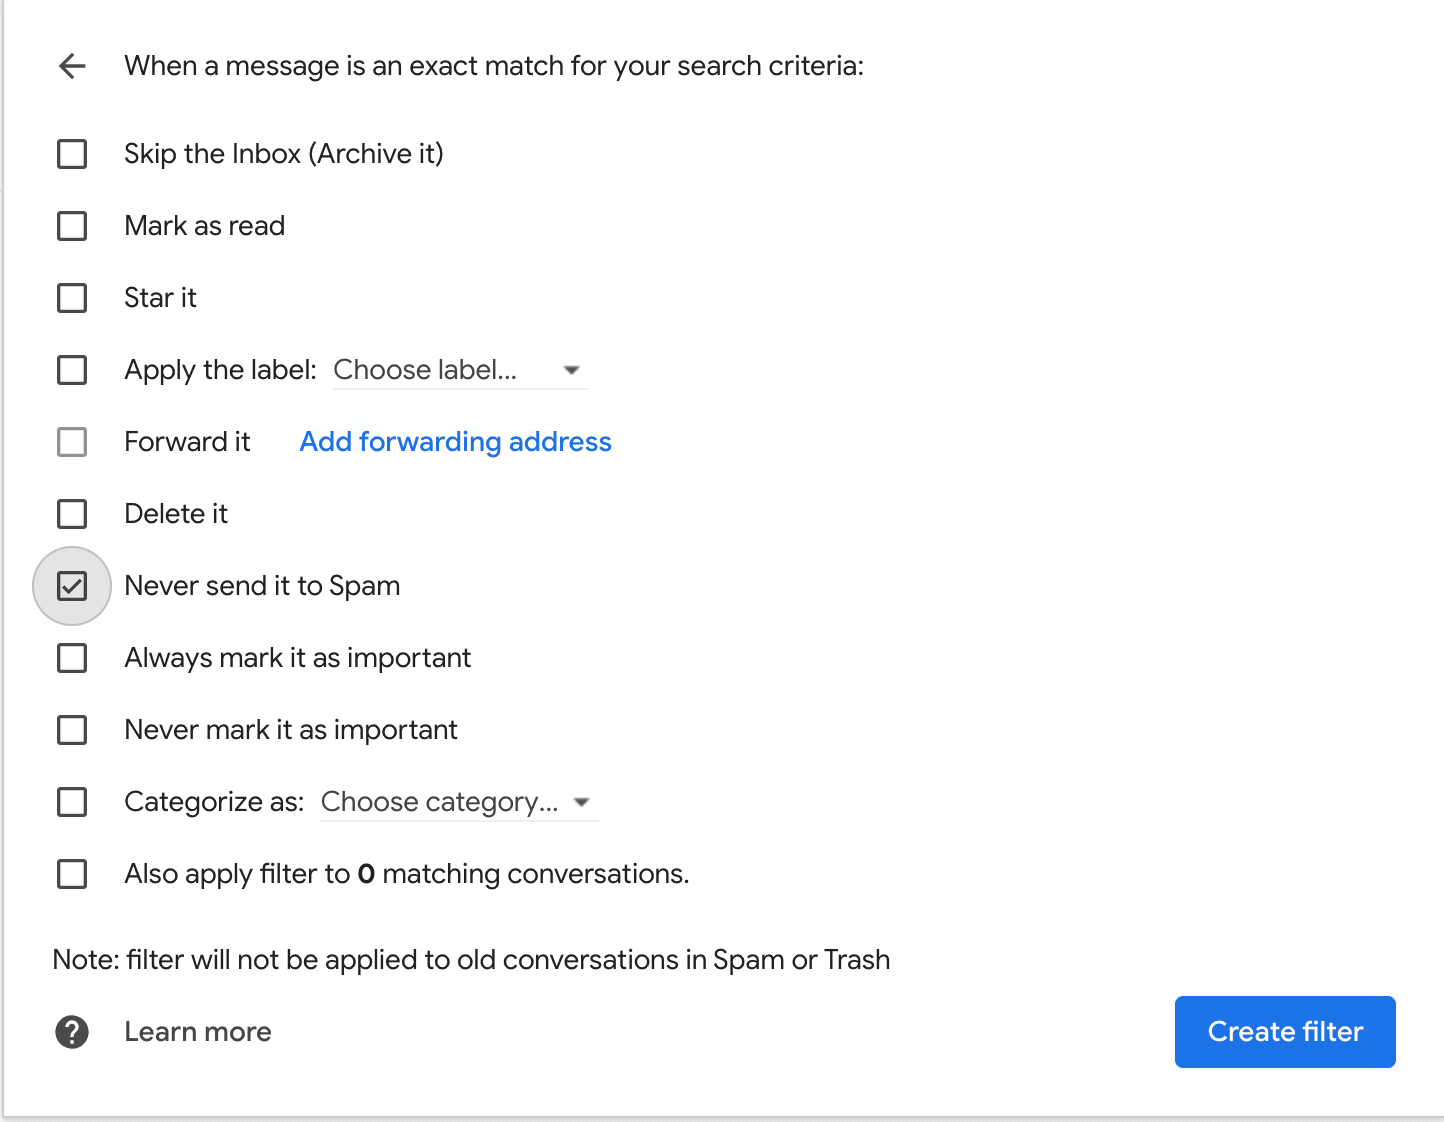
Check the box that says Never send it to Spam.
You can also check Always mark it as important if you want to prioritize these emails.
6. Save the Filter
Finally, click on Create filter again to save your settings. Gmail will now automatically send emails from this address or domain to your inbox, bypassing the spam folder.

How to Whitelist a Domain in Gmail
Whitelisting a domain in Gmail is a great option to ensure you don’t miss any emails from your employers or clients’ companies.
To do this:
1. Open Gmail and Go to Settings
Log in to your Gmail account on your desktop and click on the gear icon in the top right corner. Select See all settings from the dropdown.
2. Go to the Filters and Blocked Addresses Tab
Within Settings, navigate to the Filters and Blocked Addresses tab. This section allows you to manage custom filters.
3. Create a New Filter
Scroll down and click on Create a new filter at the bottom of your filters list.
4. Enter the Domain You Want to Whitelist
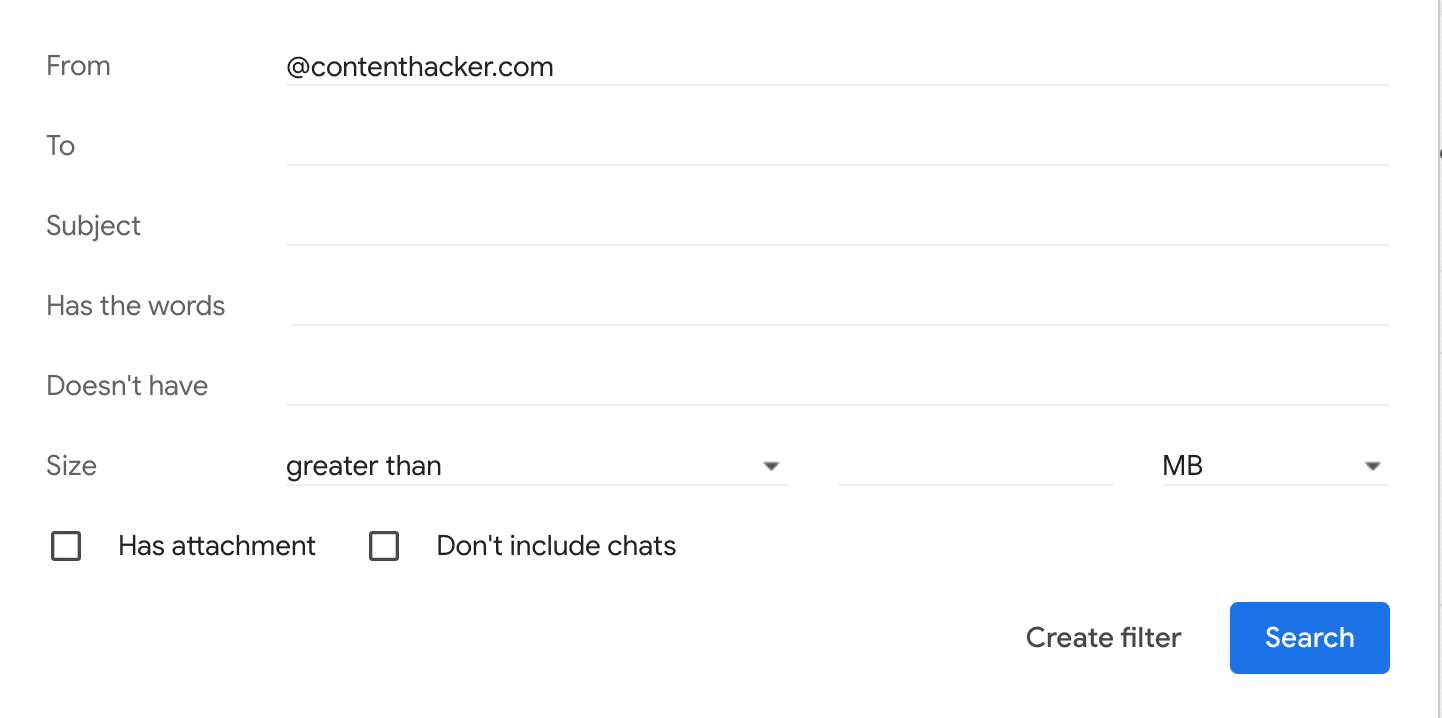
In the From field, type the domain you want to whitelist. For example, to whitelist all emails from @company.com, just type @company.com.
5. Set Up the Filter to Bypass Spam
Click Create filter.
In the filter options, check the box that says Never send it to Spam. This will ensure that all emails from the specified domain will skip the spam folder and go directly to your inbox.
6. Save Your Filter
Finally, click on Create filter once again to save it. From now on, any email coming from that domain will be whitelisted and delivered to your inbox.
How to Whitelist Multiple Email Addresses in Gmail
Do you want to whitelist multiple emails that are not from the same domain? Not a problem.
1. Open Gmail and Access Settings
Log in to your Gmail account on a desktop.
Click the gear icon in the upper right corner, then select See all settings.
2. Go to the Filters and Blocked Addresses Tab
In Settings, go to the Filters and Blocked Addresses tab, where you can create and manage custom filters.
3. Create a New Filter
Scroll down and select Create a new filter at the bottom of your filters list.
4. Enter the Email Addresses You Want to Whitelist
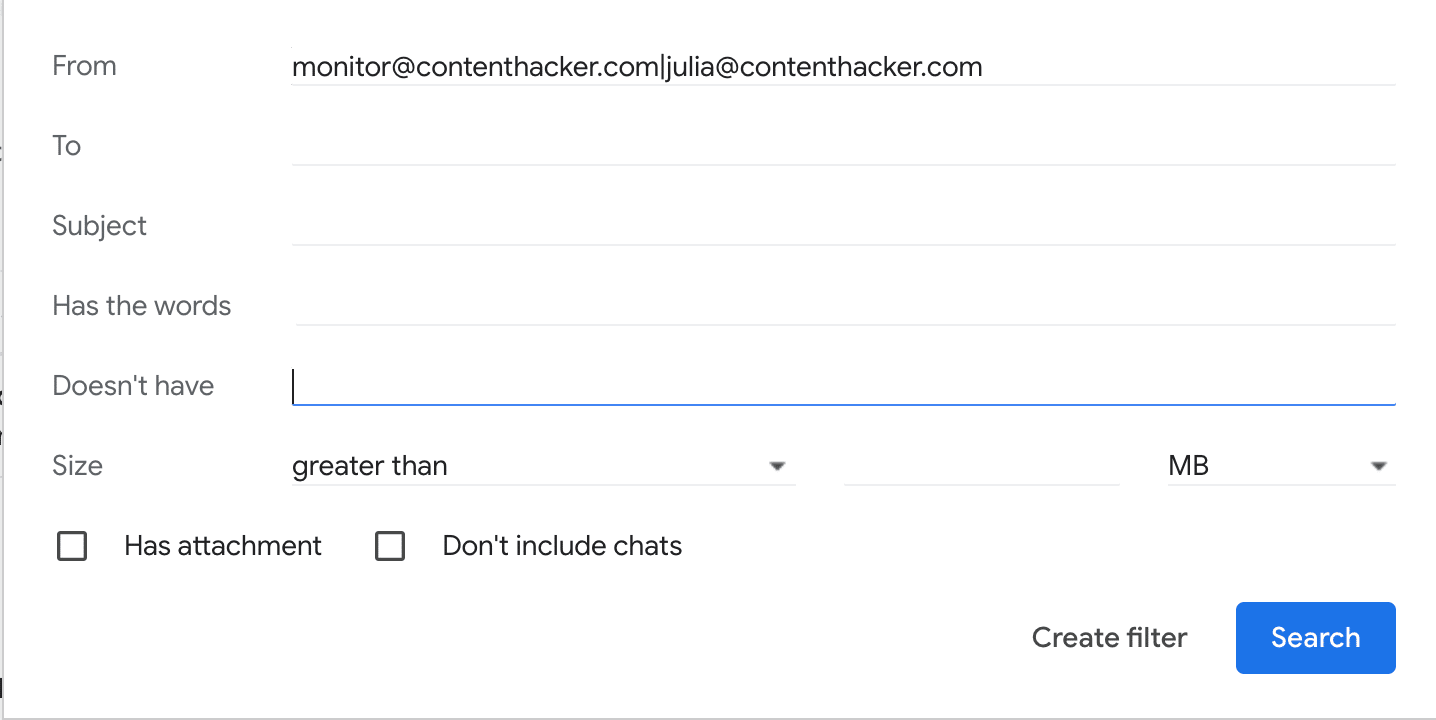
In the From field, type each email address you want to whitelist, separated by OR.
For example, enter person1@example.com OR person2@example.com OR person3@example.com.
This setup allows Gmail to recognize any of these addresses and apply the same filter rules to them.
5. Set Up the Filter to Avoid Spam
Click Create filter.
Check the box that says Never send it to Spam. This will direct emails from these addresses to your inbox, bypassing the spam filter.
6. Save the Filter
Click Create filter again to save your settings. All emails from the listed addresses will now be delivered to your inbox without being marked as spam.
Never Miss an Important Email Again
And there you have it — no more hunting for important emails in the spam folder!
By whitelisting key email addresses (or even whole domains), you’re in control of what lands in your inbox. Whether it’s messages from clients, newsletters you love, or updates you can’t miss, Gmail filters have got you covered.
Now, go ahead and enjoy a cleaner, more organized inbox!